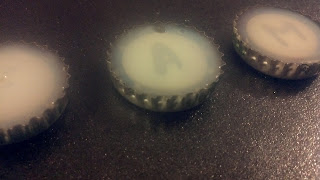
Such an awesomely creative craft. I will admit, these aren't too impressive. Not only are they my first attempt at something like this but I was only crafting to bring a bright side to this horrible day. And it worked :)
Things you'll need.
6 Bottle Caps
Scrapbook Paper
Mod Podge
Dimensional Magic
Alphabet Stickers
Flat Circular Beads
Tiny Beads
Magnets
Scissors
Pencil
To start, set aside 6 bottle caps. Take one bottle cap and place it branded side down on your scrapbook paper. With your pencil trace as close to the cap as possible to make a circle. Make one circle for every letter. Cut the circles out taking care to cut them just inside the drawn line.
With your pencil (or the opposite end of a paintbrush) lightly dip the eraser in the Mod Podge and spread on the underside of the cap. Just enough to adhere the paper to the bottom of the cap. Pop your cut out paper into the cap and press lightly.
Next put a small amount of Mod Podge on the back of the flat bead and place in the center of the bottle cap. Allow it to dry.
Now you get to use this AMAZING craft product called Dimensional Magic! One taste and you'll be hooked! I promise you. You will be using it for everything imaginable!
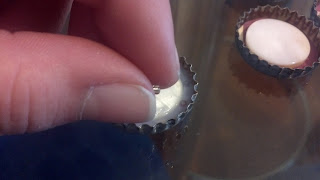
Fill the area around the bead with Dimensional Magic. Drop the tiny beads around the larger one. I used about 8 beads per cap and [tried to] space them evenly. I would definitely recommend tweezers for this part to get all the beads facing the same direction. On their sides vs on their face, for example. It was an unanticipated problem for me so mine are facing which ever way they landed.
Note: It looks "foggy" while wet but it dries clear.
After dropping in all the beads, add more Dimensional Magic to cover the face of the flat bead.
Note: I would recommend filling it to the rim of the bottle cap so there would be more of a gap between the letter and the bead. It would give it a more dimensional look. Again, this is something I didn't think of while making these. Also keep in mind for future projects that when the Dimensional Magic dries it shrinks. Often you will need to apply a second coat for achieve the bubble effect.
After the first coat has hardened, apply a sticker to the center of the flat bead and reapply the Dimensional Magic until it is bubbling up. Don't put enough to make it drain over the edge. You want it just enough to bubble up in the center. Allow to dry over night.
Note: Another issue I found is that I was getting air bubbles in the resin. Once the resin starts to dry you can't pop the bubbles without damaging your project because the bubbles have already hardened themselves. I would recommend checking the caps periodically to see if any have floated up so you can pop them while they are still wet and durable.
Once the caps are dry cut a strip of magnet and stick it to the back of the bottle cap. I buy the self-adhesive magnets just because it seems to be easier to work with. Once magnets are attached your Bottle Cap Project is complete! Now go show them off!!!
You can fill these caps with anything you like. I don't like how these turned out too much but then again I didn't put much into it. Maybe various beads and buttons, magazine clippings, strip of ribbon... anything. Have fun with it! I will be doing more later!
It is suppose to say "Family" but my "M" fell under my refrigerator and I haven't been able to find where it went. Haha. Go figure. Hopefully next round I will have more success with the lack of bubbles!!


No comments:
Post a Comment