Monday, August 22, 2011

Notepad

First I have to say that this idea came from an awesome blogger at InfarrantlyCreative.net. Ever since I have been saving every box from snacks to pastas and in this case, beer. These notepads are awesomely creative and have the potential for ultimate personalization at a very low price!


What You Need:
Product box
Paper
Mod Podge
Paper Slicer
Paint stir sticks
Two clothes pins or another form of clamp
Pencil
Paint brush

When doing these notepads, always know your paper size FIRST! It's so much easier to size the cover to the paper than working the other way around. For paper you can use index cards, scrap paper or printer paper cut to size. Your only limit is your imagination.


I took an unnecessary step in making this one. I designed my paper in Photoshop and printed it out and cut it to size. You see (above) the design is monogrammed with my last name embedded in the letter. I printed out 10 sheets of this which gave me 40 sheets in my notepad.


Before I printed this out I marked where I was suppose to cut but they were still off by a few millimeters even with exact measurements. So if you're OCD like me.. plan for this. It isn't too hard getting them even this way, but it's enough to drive me crazy... 


Next step is to trim down the box you want to use. You can use cereal boxes, snack boxes, pancake mix boxes, anything. Open your pantry and take a look at everything in there, you'll find something to use. You could always use it as an excuse to by a giant box of Goldfish like I did :) To trim the box to the right size, just mark it by tracing the paper you have already cut to size. You will need to cut two pieces. One for the front and one for the back.


Now for the important part. Stack all the paper along with the front and back of the notepad. When you are bouncing the stack of paper against the table in effort to neatly stack it, make sure that the top of the notepad is on the bottom. It's IMPERATIVE to have those pages lined up evenly or the notepad will fall apart. Once stacked, sandwich the notepad between the two paint sticks as shown in the picture above. Clamp them together with the two clothes pins. And paint a layer of Mod Podge onto the top of the notepad. Let it dry and repeat 2 or 3 more times.


You may need an alternate clamp if you have more paper. Those black paper clamps found in most offices work great and come in a variety of sizes.


Once it's dry, remove the hardware and you're ready to rock your new notepad! I love this craft. It's awesome and has sooo much potential to be amazing. You can do these for gifts or baby showers, anything. A truly a versatile art form.


--------------------------------------------------
If you liked this post click the "Follow" link on the left side of the top bar. Note: If you have a pop-up blocker enabled it may prevent you from following me until you temporarily disable it. You only have to disable it once.

Magazine Basket

I have been applying for a lot of free items online. I get subscriptions to a lot of magazines that way and once I read through them they are useless... or are they? I've been saving them hoping to find a useful way to recycle them into something else. After visiting my Mom at work recently I came across these wire-framed newspaper baskets. Cute, unique, practical and completely doable! 


What You Need:
Magazines (62 pages)
Mod Podge, watered down
Paint brush
Scissors
Patience, lots of it.


First thing's first. We need to make some paper strips for the weaving. My basket is the size of a regular piece of printer paper but you can change the instructions to fit your needs. 


To begin making the strips you will need to glue multiple pages together by overlapping them end-to-end about a half inch and then laying them out to dry. They dry in under a minute so you can stack these as you glue them. You will need 3 different lengths of strips. You will need 11 Strips made from 2 pages, 8 strips made from 3 pages, and 4 strips made from 4 pages. 


After gluing the pages together, you will need to fold them in half length-wise 3 times. You will end up with 23 strips, each a little less than an inch in width. Set aside the the 4 extra long strips. These you will use later to weave the sides in place. 


Take the 8, 3-paged strips and the 11, 2-pages strips and weave them together taking care to keep things pretty even. You will appreciate that later. If you don't know how to weave... over, under, over, under. If you still don't know how to weave, Google it. 


Bend all the edges upwards to make this next step a bit easier. Try not to get discouraged doing this first side weave. This will probably be the most difficult one but it gets much easier after this. Take one of your remaining 4-paged strips and begin weaving around the upright strips.


I found that it helped to dab a bit of glue randomly during the weave. Especially where the strip starts and ends. It helps a lot to help keep things tight. 


Once strip one is complete, breath a sigh of relief because it's smooth sailing from here on out. Repeat the process with the remaining 3 strips. If you chose not to glue as you go, be sure to at least glue the last strip. I didn't start gluing every individual weave until the third strip and I wish I had done it all the way through. It makes for a much more solid product.


Once the strips are weaved and the glue is dried, cut the access off the strip ends to make it level with the top of the basket. You will notice the tips of the cut off strips separate a bit at the tip. Easy fix. Run through them and dab glue (solid glue, not watered down) in the openings and squeeze shut. Hold it for a few seconds and move on. 


Once that is complete, your basket is done... unless you want to add one last detail. I chose to. Out of the scrap ends that you cut off, find a couple long pieces and cut them down to size. You want them to be able to lay over the edge of your basket so you will want them about an inch and a half in width. Length isn't too important as you can easily add more as you continue around the basket. When you add glue to the edges of the basket be sure to use plain glue. Do not water it down. Once you finish adding the "rim" you are finished. Stand back and admire your work! 


Stay tuned for my next blog to find something to fill it with!


----------------------------------------------
If you liked this post click the "Follow" link on the left side of the top bar. Note: If you have a pop-up blocker enabled it may prevent you from following me until you temporarily disable it. You only have to disable it once.

Sunday, August 21, 2011

Mirror/Corkboard Project

Originally, this was a framed set of mirrors. My Mom bought it at work at 90% off because it was damaged. It sat in her house for a couple months leaning against a wall until the rest of it fell apart. I adopted it and brought it home where it sat in my room for about 2 weeks until I decided what I wanted to do with it. I thought the contrast of mirrors and cork would be interesting. Add a bit of a college-punk twist to this modern themed piece of decor. It was a very simple project. Cheap too! Here we go...


Supplies:
Frame and mirrors (Free)
Cork Sheets (6.00)
Glue Gun and Glue (8.00) -you probably have this on hand already
Scissors


Trace the glass onto the Cork Sheet until you have 9 traced. There are 18 available spots but since I'm alternating between glass and cork I only need half the amount.


Cut out each of the 9 pieces. Place them in the open slots alternating the two materials until all the spots are filled. Hot glue them in place.


I like it with just the frame filled. I wanted to hang it on the wall like this and in the center of it, mount clock hands directly on the wall. Then add number stickers around the edges, or lines in place of the numbers. Shane liked the mirror in the middle so that's what I did... 


Same process. I laid the glass in the slot and used hot glue to keep it in place. And now the project is complete! A beautiful and practical mirror/corkboard. Now all that's left is to deck it out with some sweet homemade Bottle Cap Tacks from my last post :)


Love it 

Saturday, August 20, 2011

Bottle Cap Tacks

After getting some inspiration from various crafting blogs, including ModPodgeRocks.com, I've decided to finally try these things out. Bottle cap crafts are pretty awesome. The possibilities are endless. You can make rings, necklaces, magnets, tacks, buttons, knobs, bracelets... you name it. After completing my mirror/cork-board project I figured the tacks were a good place to start. Here is a very simple tutorial for Bottle Cap Tacks.


What You Need:
Bottle Caps
Gift Cards
Tacks
Epoxy Stickers
Glue Gun
Scissors


To start, warm up the Glue Gun and choose the Gift Card you want to use.


Take one of the Epoxy Stickers (found in the scrapbooking section of most craft stores) and stick it on the Gift Card in the desired place. Carefully cut the Gift Card around the sticker.


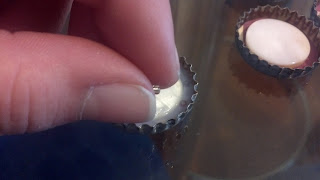
Using the Glue Gun, apply some hot glue to the center of the Bottle Cap and quickly press the Gift Card into the glue so it's level.


Next, apply the Tack with the Glue Gun.


The only Tacks I could find were covered in a plastic film that I cut off. When using hot glue on the plastic cover it melts the plastic and becomes unstable. I just cut it off with Scissors, dabbed the back of the Bottle Cap with hot glue and quickly applied the Tack. Press it as close to the Bottle Cap as you can without squeezing all the glue from underneath it. I've found that with more than a thin layer of glue between the two pieces they will come apart during normal use of the Tack.


After the Tack is applied, Congrats! You just made your first Bottle Cap Tack! Try other inserts like photographs, scrapbook paper, magazine clippings, etc. Let me know how they come out!

If you like this post click the "Follow" link on the top of this blog. If you have pop-ups disabled you may not be able to follow the blog without temporarily disabling the blocker.

Saturday, August 13, 2011

F-A-M-I-L-Y Bottle Cap Magnets

Such an awesomely creative craft. I will admit, these aren't too impressive. Not only are they my first attempt at something like this but I was only crafting to bring a bright side to this horrible day. And it worked :)


Things you'll need.
6 Bottle Caps
Scrapbook Paper
Mod Podge
Dimensional Magic
Alphabet Stickers
Flat Circular Beads
Tiny Beads
Magnets
Scissors
Pencil


To start, set aside 6 bottle caps. Take one bottle cap and place it branded side down on your scrapbook paper. With your pencil trace as close to the cap as possible to make a circle. Make one circle for every letter. Cut the circles out taking care to cut them just inside the drawn line.


With your pencil (or the opposite end of a paintbrush) lightly dip the eraser in the Mod Podge and spread on the underside of the cap. Just enough to adhere the paper to the bottom of the cap. Pop your cut out paper into the cap and press lightly.


Next put a small amount of Mod Podge on the back of the flat bead and place in the center of the bottle cap. Allow it to dry.


Now you get to use this AMAZING craft product called Dimensional Magic! One taste and you'll be hooked! I promise you. You will be using it for everything imaginable!


Fill the area around the bead with Dimensional Magic. Drop the tiny beads around the larger one. I used about 8 beads per cap and [tried to] space them evenly. I would definitely recommend tweezers for this part to get all the beads facing the same direction. On their sides vs on their face, for example. It was an unanticipated problem for me so mine are facing which ever way they landed.

Note: It looks "foggy" while wet but it dries clear.


After dropping in all the beads, add more Dimensional Magic to cover the face of the flat bead. 

Note: I would recommend filling it to the rim of the bottle cap so there would be more of a gap between the letter and the bead. It would give it a more dimensional look. Again, this is something I didn't think of while making these. Also keep in mind for future projects that when the Dimensional Magic dries it shrinks. Often you will need to apply a second coat for achieve the bubble effect.


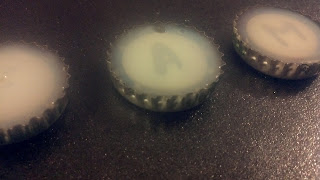
 After the first coat has hardened, apply a sticker to the center of the flat bead and reapply the Dimensional Magic until it is bubbling up. Don't put enough to make it drain over the edge. You want it just enough to bubble up in the center. Allow to dry over night.

Note: Another issue I found is that I was getting air bubbles in the resin. Once the resin starts to dry you can't pop the bubbles without damaging your project because the bubbles have already hardened themselves. I would recommend checking the caps periodically to see if any have floated up so you can pop them while they are still wet and durable.


Once the caps are dry cut a strip of magnet and stick it to the back of the bottle cap. I buy the self-adhesive magnets just because it seems to be easier to work with. Once magnets are attached your Bottle Cap Project is complete! Now go show them off!!!


You can fill these caps with anything you like. I don't like how these turned out too much but then again I didn't put much into it. Maybe various beads and buttons, magazine clippings, strip of ribbon... anything. Have fun with it! I will be doing more later!


It is suppose to say "Family" but my "M" fell under my refrigerator and I haven't been able to find where it went. Haha. Go figure. Hopefully next round I will have more success with the lack of bubbles!!

Thursday, August 4, 2011

Crafting a "K"


Working on putting my website together still. I will correct this post with the actual craft once I get some info up on my empty pages :)

Check it out...
aberranticdesign.com